What’s the difference between plain and Greek yoghurt? There’s just one, really: Greek yoghurt has part of its whey removed, which makes it thicker. This means that the production process for both types is identical up to a certain point. But how is yoghurt made?
Recipe
- 1 L / 1 qt pasteurised or raw milk
- 1 tbsp. yoghurt containing live bacteria cultures
- or freeze dried bacteria cultures (Lactobacillus delbrueckii ssp. bulgaricus and Streptococcus salivarius ssp. thermophilus)
Pour the milk into a pot and heat to 85°C (185°F), constantly stirring so it doesn’t scald. Hold the temperature for 20 minutes for maximum denaturation of whey proteins. Raw milk needs to be treated this way in order to kill any bacteria in it. With pasteurised milk, this step is technically optional, but without it, the end product will be thinner.
Cool the milk down to 40-45°C (104-113°F). Stil the yoghurt in. If using freeze dried bacteria, follow the producer’s recommended dosage.
During fermentation, keep a constant temperature of around 43°C (109°F) over 8-12 hours. After this time, the yoghurt is ready. It can be placed in the fridge, where it will thicken a bit more.
In order to make Greek yoghurt, transfer the plain yoghurt to a cheesecloth and let strain some of the whey over at least 20 minutes. The longer it’s allowed to strain, the thicker the final product will become.
Store in the fridge in a sealed container. It should keep for 2 weeks.
Additional Information
Subsequent batches can be inoculated with a spoonful of yoghurt from the previous one. However, every sebsequent batch will ever so slightly deteriorate in quality. The bacterial starter will contain progressively more of unwanted bacteria, and the wanted ones may also be in a worse shape. Whenever a batch is visibly less viscous and/or smells a bit different, it’s probably time to call it quits and inoculate the next one with fresh yoghurt.
The selection of bacterial strains isn’t random. The lacto fermentation in yoghurt is two-step. The Streptococci are the first to proliferate since they are OK with a high oxygen environment. By using oxygen up, they create more favourable conditions for Lactobacilli, which are anaerobic. As soon as their activity begins, they start to break down some of the milk proteins into amino acids that the Streptococci can use. Both break down lactose and produce lactic acid, acidifying the environment and eliminating all other microbes in the process.
When the pH hits 4.6, which is moderately acidic, but already perceivably tangy, casein denatures. This is what gives yoghurt its viscous, thick consistency.
The pronunciation of the specific epithet delbrueckii that can be heard in the video. It is derived from the name of a German chemist, Max Emil Julius Delbrück.
Video transcription
I like yoghurt. Out of all dairy products, it’s probably what I eat in the greatest amounts. That’s why making yoghurt at home was a natural step for me. It’s really simple. The ingredient list is amusingly short: just milk and… yoghurt. A detailed recipe, along with some more info, can be found on the blog.
The milk should be raw or pasteurised. It’s possible to make yoghurt with UHT milk, but research suggests that the resulting product will be less viscous and off-flavours will develop. I live in a city, so fresh milk isn’t readily available for me. So I bought some pasteurised milk.
The other ingredient, yoghurt, is just a source of bacteria. I could also use freeze dried bacteria strains, but let’s face it: one does not simply buy them in a grocery store, unlike ready made yoghurt. It’s important though that it includes live bacteria cultures.
The bacteria that I’m looking for is a mix of two strains: Lactobacillus delbrueckii ssp. bulgaricus and Streptococcus salivarius ssp. thermophilus. These two species of lactic acid bacteria are responsible for yoghurt’s distinct flavour and aroma.
I pour the milk into a pot. I slowly heat it, stirring constantly so it doesn’t scald. I want to hit 85°C, or 185°F. This will denature most of the whey proteins, but not casein. Casein does not denature under heat treatment. Denatured proteins lose their structure and unwind, creating strands that are more likely to get tangled with each other. In other words, they make yoghurt thicker. Also, the high temperature kills any bacteria, though this only matters in case of unpasteurised milk.
I maintain the temperature for 20 minutes. Next, I cool the milk down to between 40-45°C (that’s 104-113°F). When I’m in a hurry, I place the pot in the sink filled with cold water, but today I just leave the milk alone and let it cool down by itself. Cooling down is crucial since high temperature would kill the bacteria I’m going to inoculate the milk with.
I inoculate the cooled down milk by stirring in a small amount of yoghurt. There’s plenty bacteria in there and using more would negatively impact my yoghurt’s viscosity and flavour. The literature I’m familiar with fails to shed light on the cause of this phenomenon, though I suspect the phase of intense bacteria multiplication is key, and it only happens when there’s sufficiently few bacteria in the environment.
Then I cover the milk and place it in a warm spot, trying to keep a temperature of around 43°C (that’s 109°F). In order to maintain this temperature, I keep the yoghurt in the oven with just the light turned on. Of course, there are yoghurt makers, designed specifically to maintain this ideal temperature.
This temperature is not random. Both of the bacteria strains are thermophilic, which means they prefer temperatures higher than ambient temperature. In case of Lactobacillus delbrueckii, the optimal range is 43-46°C (109-115°F), while for Streptococcus salivarius it’s 35-42°C (95-108°F).
This is what my yoghurt looks like after 8 hours. It’s ready to go in the fridge, where the low temperature will thicken it some more and slow any further fermentation. Before I do it though, I’m going to prepare a quick snack.
I use seasonal fruit. Since the video was recorded in June, I was able to obtain fresh raspberries and blueberries.
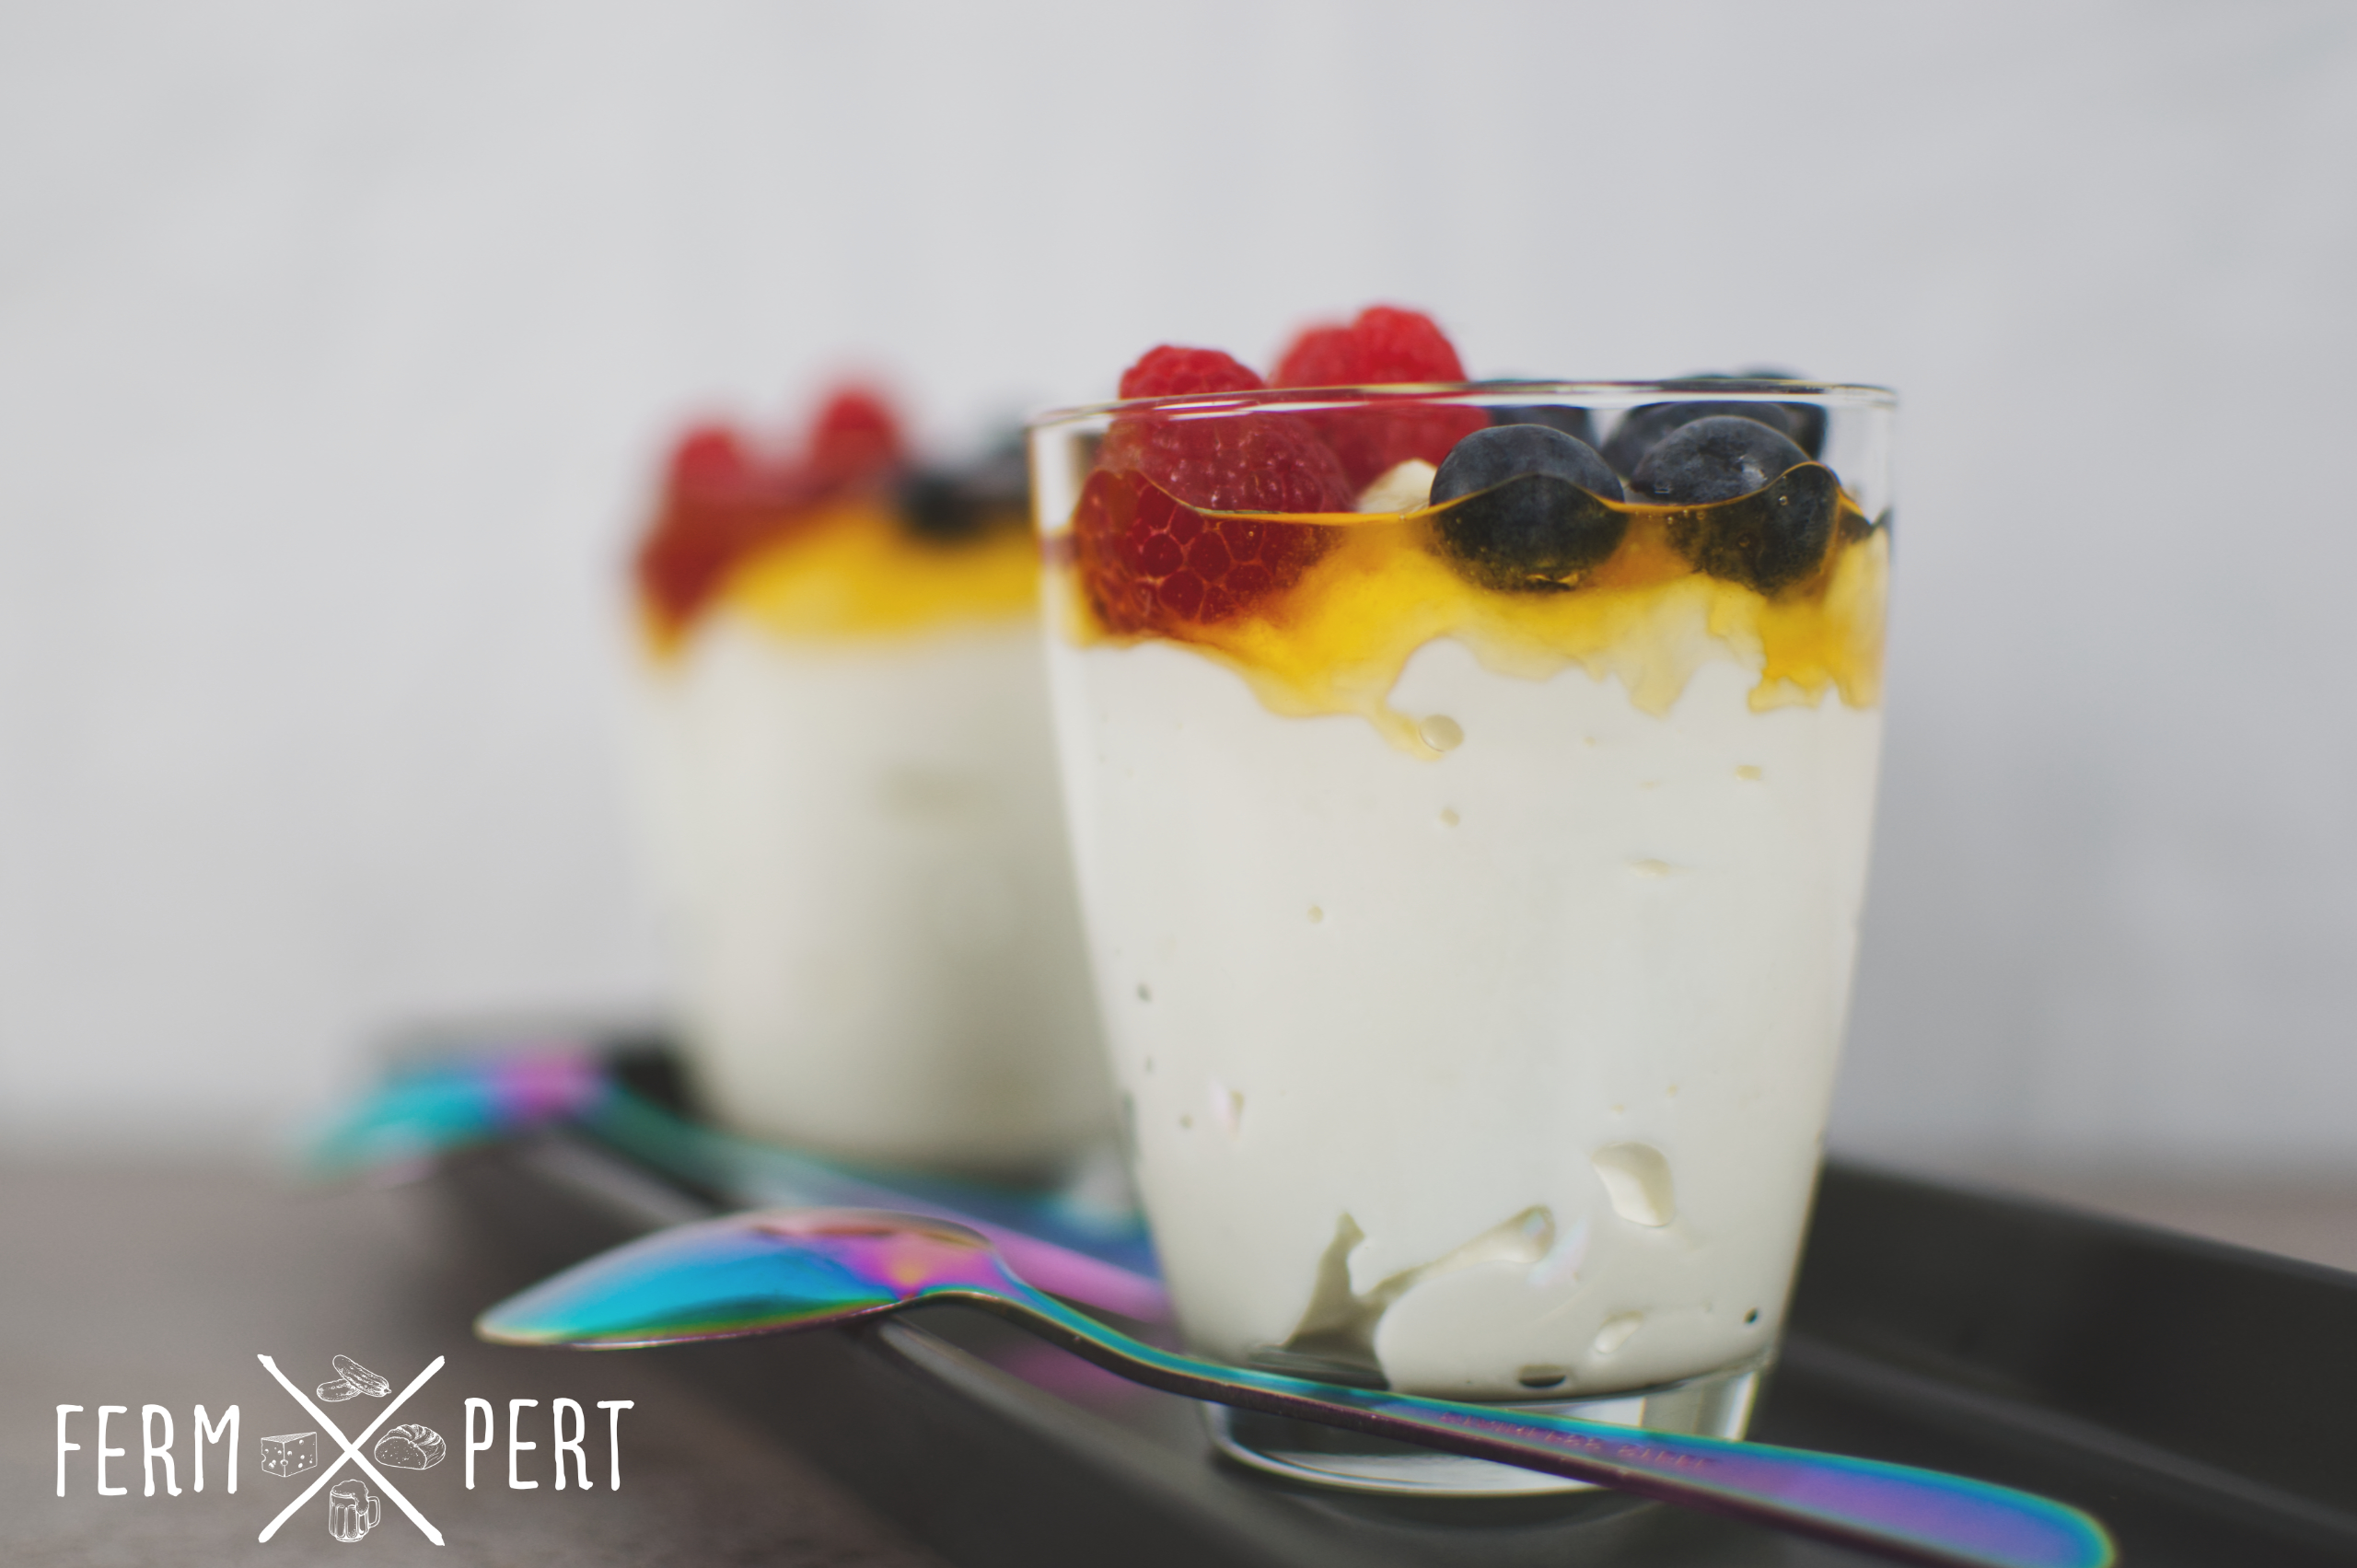
I put yoghurt into small glasses. On top, I pour some honey. It is optional, but its sweetness will be a nice balance for yoghurt’s tartness. Then I top everything with flaked almonds. Finally, I add a bit of fresh fruit. A snack like this isn’t just pretty; it also tastes fantastic.
But this isn’t where the fun ends. Plain yoghurt is delicious and healthy, but I prefer Greek yoghurt. It has a thicker consistency due to the removal of some whey.
A cotton flat nappy will serve as a cheesecloth. I line a colander with a thick layer and then transfer the yoghurt. I set the colander and bowl aside and wait until some of the whey is strained. The longer I wait, the thicker the yoghurt gets. 20 minutes is plenty, but I usually give it over an hour.
And here’s my greek yoghurt, thick and delicious. I’ll prepare another snack from it.
I start by making strawberry mousse. I simply give them a whiz with an immersion blender. I put some toasted oats on the bottom of the dessert cups. Next, in goes the strawberry mousse. And a few scoops of greek yoghurt. A bit of honey will again balance the tarness. Some flaked almonds again. And I top everything with a sprinkle of chia seeds.
I’ll store the remainder of the yoghurt in the fridge and use it within a couple of days, though it should theoretically keep for a minimum of two weeks. I’ll try not to eat everything. I’ll use the last spoon to inoculate the next batch. I should be able to prepare five generations of home made yoghurt before having to buy a fresh cup.